If you are applying to use your funds in Court to buy a property, you need to give us a national police check for every person over 16 years of age who would live with you.
If you already live in a trust property and someone new wants to move in, you need to give us a national police check for that person.
You can get a national police check from several places. We have created this guide for how to get it from Crime Check Australia because their application process is simple.
How much will it cost?
A national police check from Crime Check Australia costs $99 in 2026.
You can get a police check from other agencies, like Service Victoria ($89.10 in 2026) or the Australian Federal Police ($56 in 2026).
You can apply to be reimbursed from your funds in Court.
Collect your information
You will need:
- a credit or debit card
- your legal names and any previous names
- your date and place of birth
- your gender information
- your addresses for the last five years
- your identity documents – the easiest combination is your passport, driver licence and Medicare card. There are other options though – Crime Check Australia has more information on their website and they have a Document Guide [PDF 2MB].
Go to the Crime Check Australia application page.
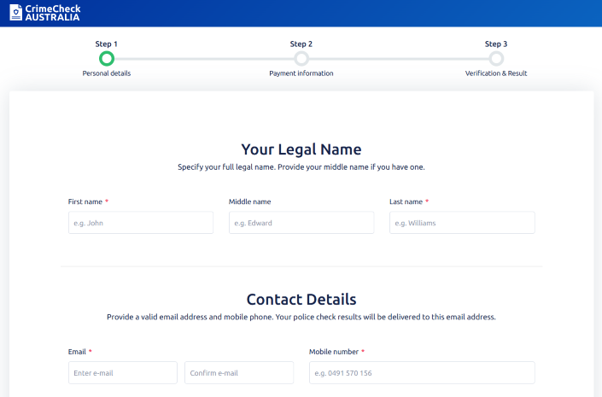
Enter your personal details. You will be asked for your legal name and your contact details.
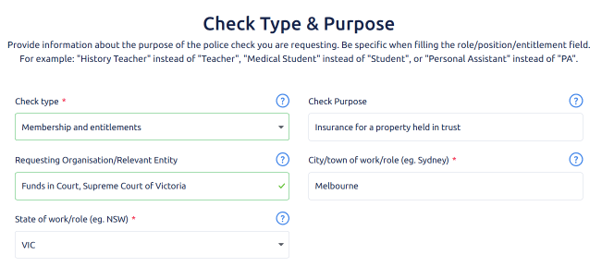
You will be asked about the Check Type & Purpose.
Check type = Membership and entitlements
Check Purpose = write “Insurance for a property held in trust”
Requesting Organisation/Relevant Entity = write “Funds in Court, Supreme Court of Victoria”
City/town of work/role = write the city or town where the property you want to buy is. If you haven’t found a specific property yet, put the city or town where you are looking.
State or work/role = select the state where the property you want to buy is from the dropdown list.
For example:
Check that all of your information is correct – you cannot change it later.
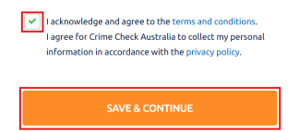
Tick the box if you agree to the terms and conditions and for your personal information to be collected.
Click Save & Continue.
A payment screen will load. Enter your payment details and click Submit Payment & Continue.

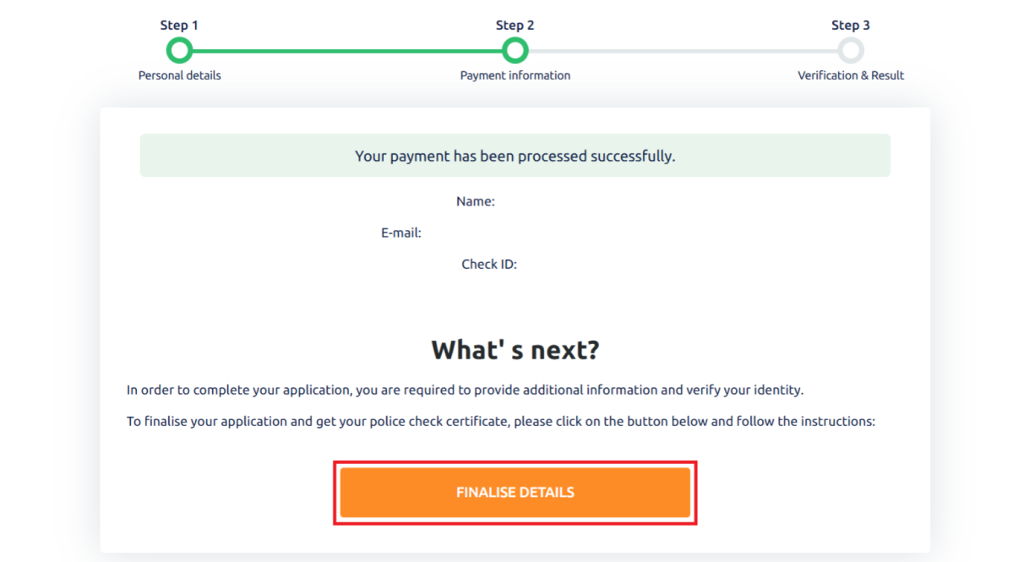
The screen will reload when your payment has been processed.
You will also get an email from Crime Check Australia. This includes a link you can use to return to your application at a later time.
When you are ready to provide your identification documents, click on Finalise details.
If you are coming back to your application, you will be asked to log in. The Resume existing application screen will load.
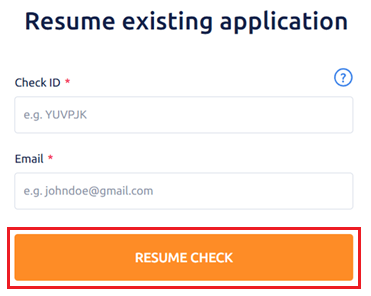
Your Check ID is in the email you would have received from Crime Check Australia.
Enter your Check ID, the email address you provided in Step 1, and click Resume Check.
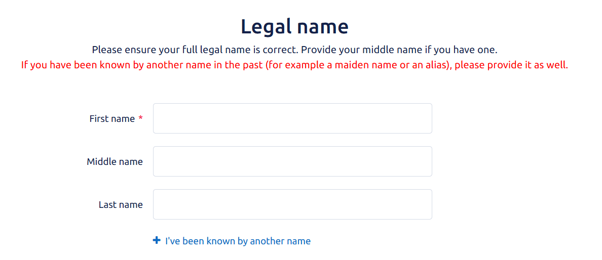
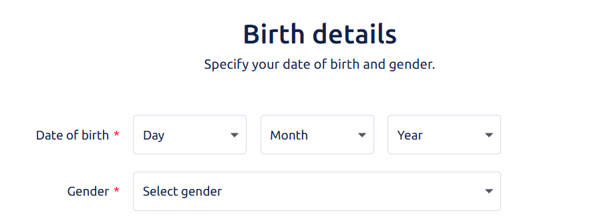
You will be asked to provide your personal details – your legal name, birth details and place of birth.
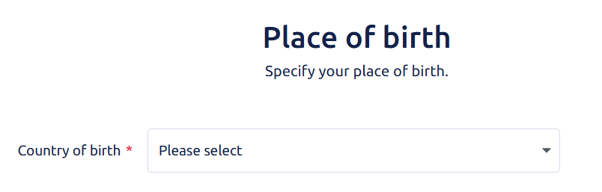
Once you have selected the country of your birth, more fields will appear.
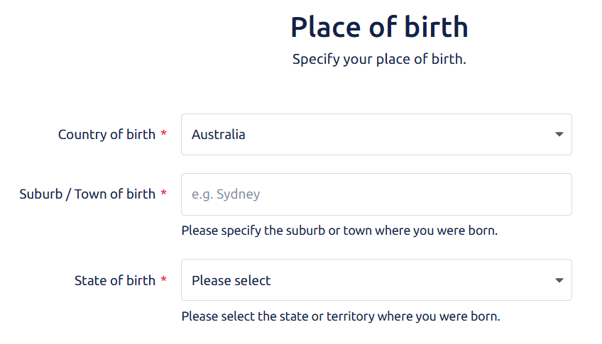
The last item on this screen is Purpose clarification. This is not required.
Check that all of your information is correct – you cannot change it later.
Click Save & Next.

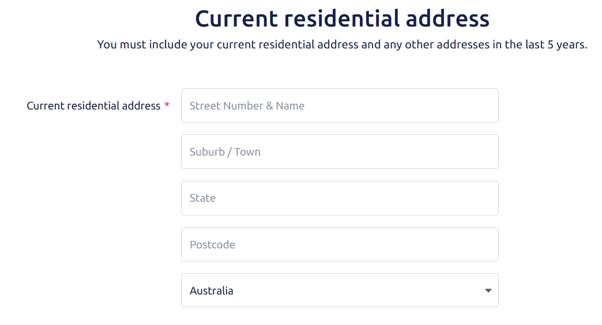
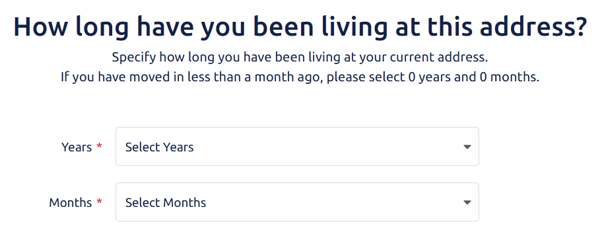
A new screen will load. Enter your current residential address and how long you have been living at this address.
If you have been living at your current address for less than five years, you will be asked to provide your previous addresses for the last five years.
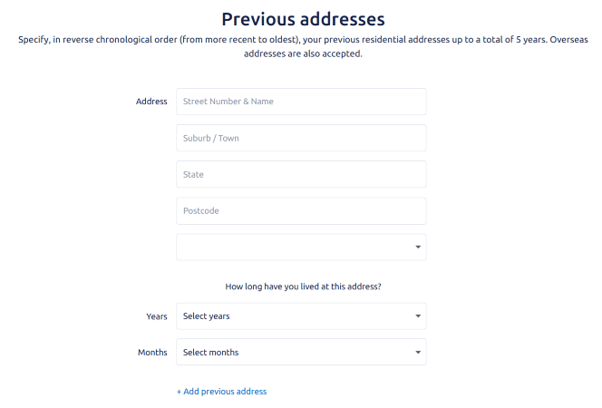
When you have entered all of your previous addresses for the last five years, check that all of your information is correct – you cannot change it later.
Click Save & Next.
The Identity Documents Upload screen will load.
You can choose to take photos of your identity documents on your smartphone, or to continue on your current device.
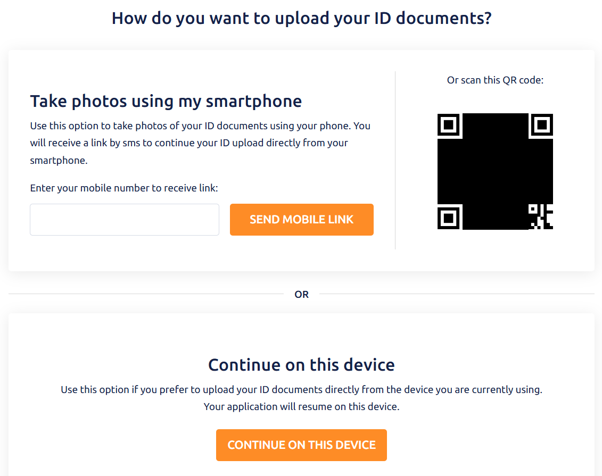
The procedure is the same whether you use a smartphone or your current device. It can be a little faster to use a smartphone as you can take pictures and upload them directly to Crime Check Australia.
The guide below uses screenshots from a laptop.
Select the type of document you can provide from the dropdown list.
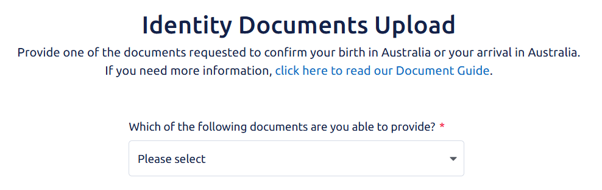
More fields will appear once you have made a selection, for example:
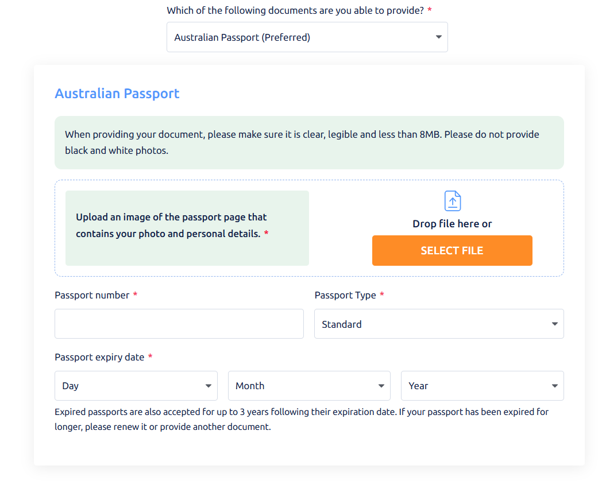
Check that all of your information is correct – you cannot change it later. When you have entered your first document, click Save & Next.
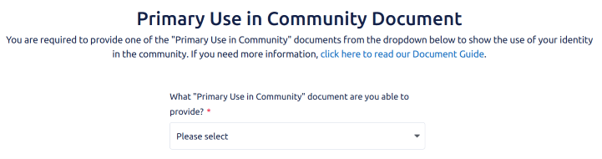
Primary Use in Community Document
The Primary Use in Community Document screen will load.
Select the type of document you can provide from the dropdown list.
More fields will appear once you have made a selection, for example:
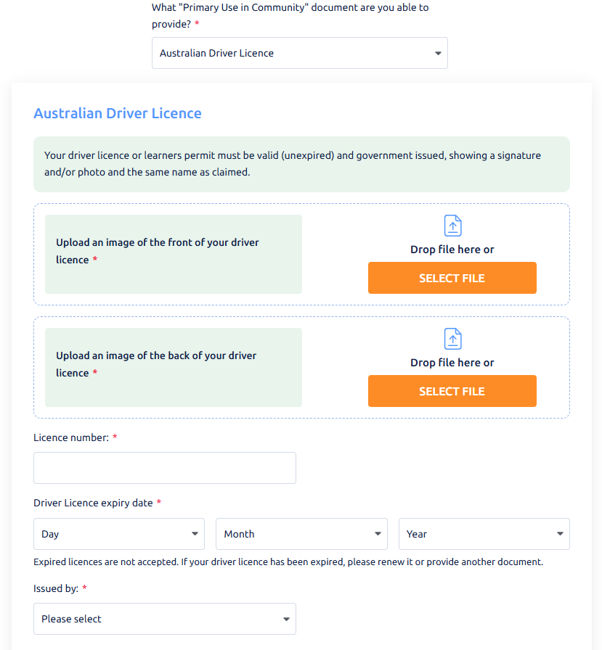
Check that all of your information is correct – you cannot change it later.
When you have entered your primary use in community document, click Save & Next.
Secondary Use in the Community Documents
The Secondary Use in the Community Documents screen will load. Select one document you can provide from the list.
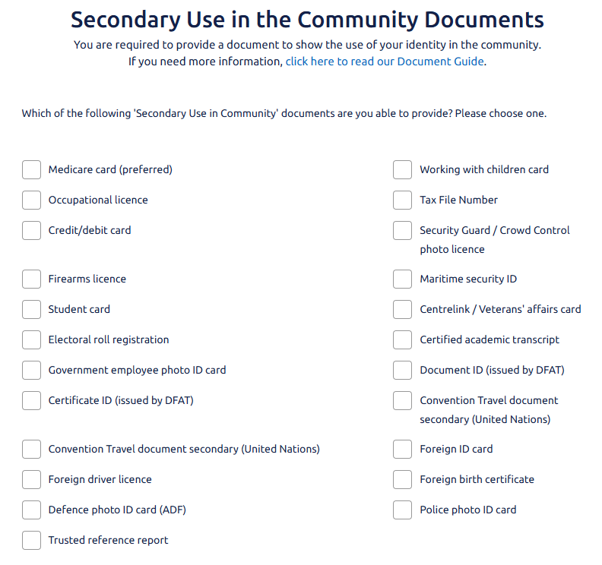
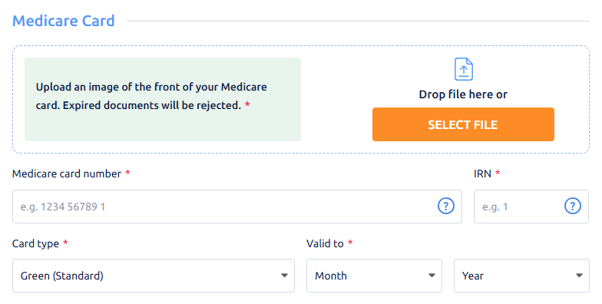
More fields will appear once you have made a selection, for example:
Check that all of your information is correct – you cannot change it later.
When you have entered your secondary use in the community document, click Save & Next.
Selfie time!
The Selfie Time! screen will load.
You can choose to take a photo of yourself with one of your identity documents on your smartphone, or to continue on your current device.
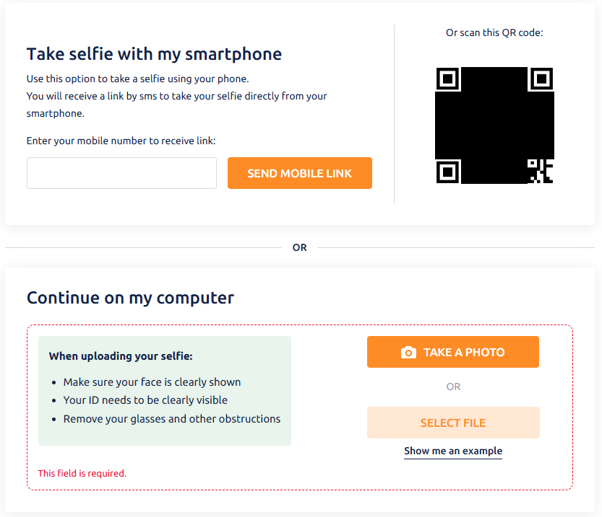
Once you have provided your selfie, click Save & Next.
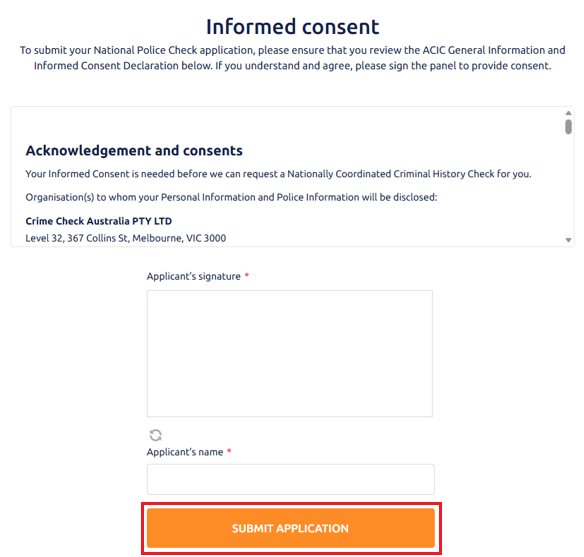
Informed consent
The Informed consent screen will load.
If you understand and agree, sign in the box and write your full name in the box underneath. Click Submit Application.
The submission confirmation screen will load.
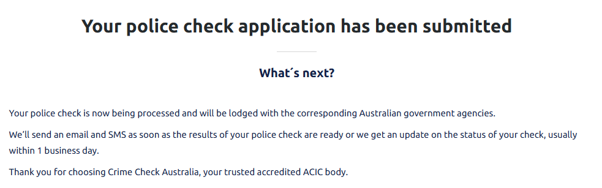
You will also get an email from Crime Check Australia to confirm your application has been submitted.
When it is ready, your national police check will be sent to your email.
Send the national police check to Funds in Court
You need to send the national police check to funds in Court as soon as you receive it. Please send it to requests@fundsincourt.vic.gov.au.